| Start with at least a rough outline of the goal and major points of the presentation before selecting the visual aid(s). For example, a particular scene or slides may trigger ideas for the presentation, providing the power of images. Do not proceed too far without first determining what you want to accomplish, what your audience wants to gain, and what the physical setting requires.Each element of an audio-visual product – a single slide or a page of a flip chart presentation, for example, – must be simple and contain only one message. Placing more than one message on a single image confuses the audience and diminishes the potential impact of visual media. Keep visual aids BRIEF.Determine the difference between what you will say and what the visual aid will show. Do not read straight from your visuals.Ask the audience to read or listen, not both; visual aids should not provide reading material while you talk. Rather, use them to illustrate or highlight your points.Give participants paper copies of various graphic aids used in your presentation. They will be able to write on the paper copies and have them for future reference.Assess your cost constraints. An overhead transparency presentation can always be used in a formal environment if 35 mm slides are too expensive.Account for production time in your planning and selection process. Slides must be developed, videotape edited – you do not want to back yourself against a wall because the visuals are not ready. You can often get production work done in 24-48 hours, but it is much more expensive than work that is done on an extended schedule.Use local photographs and examples when discussing general problems and issues. While a general problem concerning welding safety, for example, may elude someone, illustrating with a system in use at the site can bring the issue home.Use charts and graphs to support the presentation of numerical information.Develop sketches and drawings to convey various designs and plans.When preparing graphics, make sure they are not too crowded in detail. Do no over-use color. See that line detail, letters, and symbols are bold enough to be seen from the back of the room.Do not use visual aids for persuasive statements, qualifying remarks, emotional appeals, or any type of rhetorical statement.If you have handouts, don’t let them become a distraction during the presentation. They should provide reinforcement following your address. Consider giving them out after the presentation, unless the audience will use them during the presentation or will need to review them in advance of the presentation.Practice presenting the full program using graphic materials so you are familiar with their use and order. If you use audio-visual materials, practice working with them and the equipment to get the timing down right.Seek feedback on the clarity of your visuals and do so early enough to allow yourself time to make needed adjustments. |
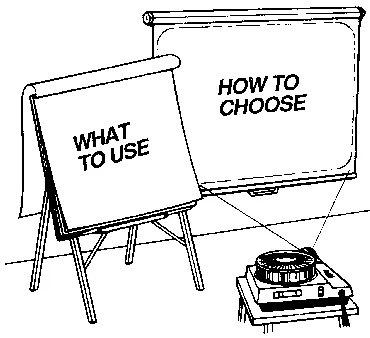 |
The question of what to use and how to choose is an excellent one. The next several pages will help you answer this question by identifying the advantages and limitations of each type of visual, as well as the development techniques required in preparing each. By looking at these pros and cons, you can more easily decide what will work best for your presentation. |
| Flip Charts |
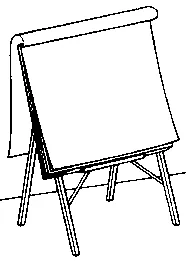 Flip charts are quick, inexpensive visual aids for briefing small groups. The charts, felt-tip markers and graphic materials are readily available, and with a modest ability at lettering, the presenters can compose the desired visual aid in-house. Flip charts are quick, inexpensive visual aids for briefing small groups. The charts, felt-tip markers and graphic materials are readily available, and with a modest ability at lettering, the presenters can compose the desired visual aid in-house.Flip Charts:Help the speaker proceed through the materialConvey informationProvide the audience with something to look at in addition to the speakerCan be prepared prior to, as well as during, the presentationDemonstrate that the speaker has given thought to his or her remarksCan be used to record audience questions and commentsCan be converted to slidesLimitations:May require the use of graphics talentAre not suitable for use in a large audience settingMay be difficult to transportWhen Developing Flip Charts:Each sheet of paper should contain one idea, sketch, or theme.Words, charts, diagrams, and other symbols must be penned in a large enough size to be seen by people farthest from the speaker.In general, make each letter at least 1/32″ high for each foot of distance from the material. For example, a 1-inch letter is legible from 32 feet, and a 2-inch letter from 64 feet. Divide the distance from the back of the room to the visual by 32 to determine the minimum size of letters.Use block lettering, since it is easiest to read. Use all capital letters, and do not slant or italicize letters.Use and vary the color. Also, check from a distance to make sure the color works well and is not distracting. |
| Overhead Transparencies |
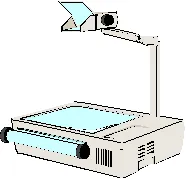 Overhead transparencies are useful for audience settings of 20 to 50 people and can be produced quickly, easily, and inexpensively. Any camera-ready artwork, whether word charts, illustrations, or diagrams can be made into transparencies using standard office paper copiers.Most manufacturers of paper copiers offer clear and colored acetate sheets that run through copying machines like paper, but transfer a black image into acetate for use as overhead transparencies.The standard transparency size is 8=” x 11”. The only piece of hardware required is an overhead transparency projector.Overlay transparencies provide a good cumulative presentation.Speaker can use an overhead projector with significant light in the room, thereby enabling the speaker to maintain eye contact with the audience.Limitations:The projected image size is sometimes too small to be seen from the back of a large room.Often, the image does not sit square on the screen, as the head of the projector is tilted to increase the size of the image.It is difficult to write on the transparency while it is on the projector.Sometimes the projector head gets in the audience’s way.Some speakers feel captive to the machine, because they must change each transparency by hand.When Developing Overhead Transparencies:To add color, simply cut a piece of colored acetate gel, available at art stores, to the shape and dimensions needed to highlight a particular part of a transparency. The second (or third) color is taped to the edges of the transparency with clear tape, or glued over an area with clear invisible adhesive such as spray adhesive.Permanent and/or water-soluble ink color marker pens are available for use in hand-coloring parts of an overhead transparency.Overhead transparencies can be developed during a presentation by marking on acetate sheets with water-soluble or permanent transparency pens. The same approach can be used to add information to existing transparencies. In both cases, a damp tissue can be used to wipe information off a transparency that has been marked with water-soluble ink.When removing a transparency from the machine during the presentation, slide the next immediately underneath it to achieve a smooth transition. Don’t leave the screen blank with the light on.A 45-degree angle to the audience is the most effective location for an overhead projector and screen. This provides for the least obstructed view. Ideally, set the projector on a table lower than the surrounding tables or platforms to make it less imposing.Transparencies with too much information – especially typed pages designed for a printed piece and transferred to acetate – are confusing. Keep transparencies simple.When typing words for transparencies, use bold typing elements such as HELVETICA and capitalize.Consider making use of a laser printer that can produce good quality transparencies in a variety of bold type styles. These printers, coupled with desktop or portable personal computers are widely available, and prices have dropped significantly. The quality of type and variety of type styles make this a superior option when compared with transparencies done on an office typewriter. If resources permit, color printers are also available. Overhead transparencies are useful for audience settings of 20 to 50 people and can be produced quickly, easily, and inexpensively. Any camera-ready artwork, whether word charts, illustrations, or diagrams can be made into transparencies using standard office paper copiers.Most manufacturers of paper copiers offer clear and colored acetate sheets that run through copying machines like paper, but transfer a black image into acetate for use as overhead transparencies.The standard transparency size is 8=” x 11”. The only piece of hardware required is an overhead transparency projector.Overlay transparencies provide a good cumulative presentation.Speaker can use an overhead projector with significant light in the room, thereby enabling the speaker to maintain eye contact with the audience.Limitations:The projected image size is sometimes too small to be seen from the back of a large room.Often, the image does not sit square on the screen, as the head of the projector is tilted to increase the size of the image.It is difficult to write on the transparency while it is on the projector.Sometimes the projector head gets in the audience’s way.Some speakers feel captive to the machine, because they must change each transparency by hand.When Developing Overhead Transparencies:To add color, simply cut a piece of colored acetate gel, available at art stores, to the shape and dimensions needed to highlight a particular part of a transparency. The second (or third) color is taped to the edges of the transparency with clear tape, or glued over an area with clear invisible adhesive such as spray adhesive.Permanent and/or water-soluble ink color marker pens are available for use in hand-coloring parts of an overhead transparency.Overhead transparencies can be developed during a presentation by marking on acetate sheets with water-soluble or permanent transparency pens. The same approach can be used to add information to existing transparencies. In both cases, a damp tissue can be used to wipe information off a transparency that has been marked with water-soluble ink.When removing a transparency from the machine during the presentation, slide the next immediately underneath it to achieve a smooth transition. Don’t leave the screen blank with the light on.A 45-degree angle to the audience is the most effective location for an overhead projector and screen. This provides for the least obstructed view. Ideally, set the projector on a table lower than the surrounding tables or platforms to make it less imposing.Transparencies with too much information – especially typed pages designed for a printed piece and transferred to acetate – are confusing. Keep transparencies simple.When typing words for transparencies, use bold typing elements such as HELVETICA and capitalize.Consider making use of a laser printer that can produce good quality transparencies in a variety of bold type styles. These printers, coupled with desktop or portable personal computers are widely available, and prices have dropped significantly. The quality of type and variety of type styles make this a superior option when compared with transparencies done on an office typewriter. If resources permit, color printers are also available. |
| Posters |
Posters are prepared graphic devices that can be made of a variety of materials and media – photographs, diagrams, graphs, word messages, or a combination of these. Posters work best in smaller audience sizes.Posters are permanent and portable.Posters can be simple or very elaborate.Posters can be used alone or in a series to tell a story.Limitations:Posters tend to contain too much detail.Transporting them can be difficult.The more elaborate posters require extensive preparation and can be quite costly.When preparing posters:Each poster should contain one message or theme.Words, charts, diagrams, and other symbols must be penned in a large enough size to be seen by everyone in the room.Use all capital letters, and do not slant or italicize letters.Use and vary the color. Also, check from a distance to make sure the color works well and is not distracting. |
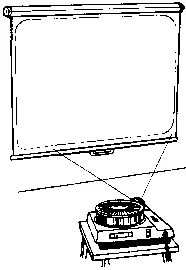
| 35 Millimeter Slides |
 35 mm slides enliven a presentation for virtually any size audience. They can project a professional image, are relatively inexpensive to produce, and if necessary, can be produced quickly.Slides have high credibility with audiences because viewers looking at photographic slides taken in the field often feel that seeing is believing.The only hardware required is a slide projector and a screen. Slide programs are easy to package in slide trays.Changes in slides or in their sequencing can be done rapidly to meet changing conditions or audiences.Limitations:Slides cannot be made using a photocopying machine. Therefore, they require more time and money to produce than overhead transparencies.The lights must be dimmed more for slides than for overhead transparencies.Slides require a great deal of preparation and rehearsal.When Developing a Slide Presentation:Use the outline or text of your talk to note places for appropriate visuals.The best slide programs often mix field photographs with slides of charts, graphs, and other supporting images.Catalog and categorize slides, and place a date, location, and other relevant information on each slide.Vendors can make word slides and illustrations by computer, though they tend to be costly. 35 mm slides enliven a presentation for virtually any size audience. They can project a professional image, are relatively inexpensive to produce, and if necessary, can be produced quickly.Slides have high credibility with audiences because viewers looking at photographic slides taken in the field often feel that seeing is believing.The only hardware required is a slide projector and a screen. Slide programs are easy to package in slide trays.Changes in slides or in their sequencing can be done rapidly to meet changing conditions or audiences.Limitations:Slides cannot be made using a photocopying machine. Therefore, they require more time and money to produce than overhead transparencies.The lights must be dimmed more for slides than for overhead transparencies.Slides require a great deal of preparation and rehearsal.When Developing a Slide Presentation:Use the outline or text of your talk to note places for appropriate visuals.The best slide programs often mix field photographs with slides of charts, graphs, and other supporting images.Catalog and categorize slides, and place a date, location, and other relevant information on each slide.Vendors can make word slides and illustrations by computer, though they tend to be costly. |
| Audio-Slide Show |
 Audio-slide shows are self-contained programs having pre-recorded sound tracks that are coordinated with slides by use of electronic synchronizers. The recording tape includes electronic signals that activate a connected slide projector so that an image appears simultaneously with the appropriate voice message, music or sound effects. Audio-slide programs can serve audiences ranging from a handful to a couple of hundred people.For a fraction of the cost of films, audio-slide programs can achieve many of the same program needs.They can impart considerable information because color and a wide array of audio-techniques and visual images can be used.If multiple projectors are used with dissolve units that allow images to “fold” into one another, even a sense of movement can be created.They usually can be produces in-house, equipment is accessible, and they offer a presenter the flexibility of changing slides to meet the needs of specific audiences.Limitations:Time must be allotted for developing script, sound-track, title and credit slides, visuals, and for production.Each presentation requires securing and assembling proper equipment synchronizer, tape recorder, projector(s), screen(s).Good maintenance must be given to slides so that a warped slide doesn’t malfunction and throw off an entire presentation.When Developing a Program:Identify all components to the program and possible resources to assist in developing these components (e.g., photo lab, recording studio, slide library, graphic artists, a person who has prepared similar programs).Make an initial contact with resource personnel to see what services they can provide, time frames and their scheduling requirements.Develop a tentative production schedule.Prepare a script or a story board and carry this script with you.Photograph or borrow slides of scenes that emphasize your points. Also, gather charts, drawings, books, or other resource materials pertinent to the subject which may be photographed or reproduced graphically as slides.Keep images to one message per frame.Test-run the slide-tape show with enough time to replace slides that are unclear.Secure permission to use commercial or otherwise copyrighted music or material.Keep credit slides to a minimum and use simple design for clarity. Audio-slide shows are self-contained programs having pre-recorded sound tracks that are coordinated with slides by use of electronic synchronizers. The recording tape includes electronic signals that activate a connected slide projector so that an image appears simultaneously with the appropriate voice message, music or sound effects. Audio-slide programs can serve audiences ranging from a handful to a couple of hundred people.For a fraction of the cost of films, audio-slide programs can achieve many of the same program needs.They can impart considerable information because color and a wide array of audio-techniques and visual images can be used.If multiple projectors are used with dissolve units that allow images to “fold” into one another, even a sense of movement can be created.They usually can be produces in-house, equipment is accessible, and they offer a presenter the flexibility of changing slides to meet the needs of specific audiences.Limitations:Time must be allotted for developing script, sound-track, title and credit slides, visuals, and for production.Each presentation requires securing and assembling proper equipment synchronizer, tape recorder, projector(s), screen(s).Good maintenance must be given to slides so that a warped slide doesn’t malfunction and throw off an entire presentation.When Developing a Program:Identify all components to the program and possible resources to assist in developing these components (e.g., photo lab, recording studio, slide library, graphic artists, a person who has prepared similar programs).Make an initial contact with resource personnel to see what services they can provide, time frames and their scheduling requirements.Develop a tentative production schedule.Prepare a script or a story board and carry this script with you.Photograph or borrow slides of scenes that emphasize your points. Also, gather charts, drawings, books, or other resource materials pertinent to the subject which may be photographed or reproduced graphically as slides.Keep images to one message per frame.Test-run the slide-tape show with enough time to replace slides that are unclear.Secure permission to use commercial or otherwise copyrighted music or material.Keep credit slides to a minimum and use simple design for clarity. |
| Videotape |
 Videotape electronically carries both a picture and a sound track. Its features of sound, movement, vivid image, color, and variety hold an audience’s attention the way film does. Videotape can be used to program an entire presentation, or to support a speaker’s remarks by highlighting certain topics. Videotape electronically carries both a picture and a sound track. Its features of sound, movement, vivid image, color, and variety hold an audience’s attention the way film does. Videotape can be used to program an entire presentation, or to support a speaker’s remarks by highlighting certain topics.Limitations:Videotape productions can be expensive to create and require experienced production teams.In large meetings, the audience may not be able to see the monitor. (If resources permit, video projectors are available.)When Developing Videotape:Practicing with the equipment by filming, as well as showing, is the best way to overcome hesitancies about its use.To cover the basics if you are brand new to video use, budget yourself a one hour session with an experienced video producer, whether amateur or professional. University extension programs and the local cable T.V. station are good places to check for a no-cost session. Discuss your ideas. Your budget will determine whether you should tape on your own or have a professional make the videotape.Composing and editing a 15-minute video production can easily consume dozens of hours whether you do all of the work or contract to have part of it done. In order for this kind of investment to pay off, it usually means that the final product should be viewed by a large audience or multiple audiences. Consider the facilities available before choosing to use videotape.TESTING THE DESIGN OF YOUR PRESENTATION When you have prepared the visuals you want to use in your presentation, you must practice using them. Do a practice run in full, preferably with someone you know well and with someone you do not know well. Alternatively, use a video or audio tape recorder, or a mirror. If you are making a group presentation, do a complete practice run in full. A practice run will ensure that each presentation builds on the previous one and that all the points are covered. These colleagues can also provide valuable feedback. The tips below will help you make the most out of your practice runs:Seek feedback at the point when you have your material well organized but not committed to memory. This will enable any needed changes to be incorporated easily.This feedback should include an evaluation of the presentation’s length, logic, clarity, and interest level; the speaker’s rate of delivery, voice level, and conversational pattern; and the usefulness of the visual aids.Once you are satisfied with the content of your presentation, make sure that the technical supports are in place or lined up:Check with the meeting organizer to make sure the equipment you need will be there.If at all possible, arrive at the location of your presentation an hour early to check your equipment and room arrangements. Practice using your visuals with the equipment provided. Make sure that you know where the on/off switch is and make arrangements to have the lights dimmed, if necessary.Rehearsal is a fundamental step in developing and refining effective presentations. Practicing your presentation and working closely with the meeting organizer to secure the necessary technical supports will assist you in making a smooth performance. |
My WordPress Blog


Comments are closed.